To create HTML code for images, do the following:
- Upload the image via Content > Media > Add Media > Image
- Use ‘Choose File’ to select the file
- Fill in ‘Alternative text’ field
- ‘Save’
- The page will refresh, and you’ll end up on Content > Media
- Click the ‘Media Name’ for the image you just added
- Right click on the file name > ‘Copy Link Address’
- Paste the relative portion of the link into the HTML code (or paste in the whole link and then remove the https://www.omnipod.com portion):
- <p><img src="/sites/default/files/2022-04/blog_podder-myrthe_living-on-my-own-with-type-1_setting-up-pod.jpg" width=""/></p>
- Note: Be sure that you still have one double quote on each end of the link with no spaces between the quotes and the link.
To insert the HTML code for the image(s) into your blog post body copy, do the following:
- Go to the Edit tab of the blog post
- In the Body section click the ‘Source’ button in the top toolbar
- Find the paragraph that you want to add the picture beneath, add a line using return after the end of that paragraph
- Note: Be sure that the paragraph keeps its </p> at the end of its code.
- Paste in the HTML code on this new line
- Click the ‘Source’ button again to exit source mode
- Note: You must exit source mode before saving! If you save the page and your changes were not saved it is likely because this step was skipped.
- Click ‘Save (this translation)’ at the bottom of the page
Image Sizing
If your image is too large or too small, you will need to add a width to the HTML code.
- Look for the width="" portion of the code
- Between the double quotes, add 1000px to get width="1000px"
- Then exit source mode to see what size that makes your image
- Example: the screenshot image placed at the end of this page has width="1000px" in its code.
- If it is too large go back into source mode and change the 1000px to a lower number
- You may need to repeat steps 3-4 a few times before you find the best size
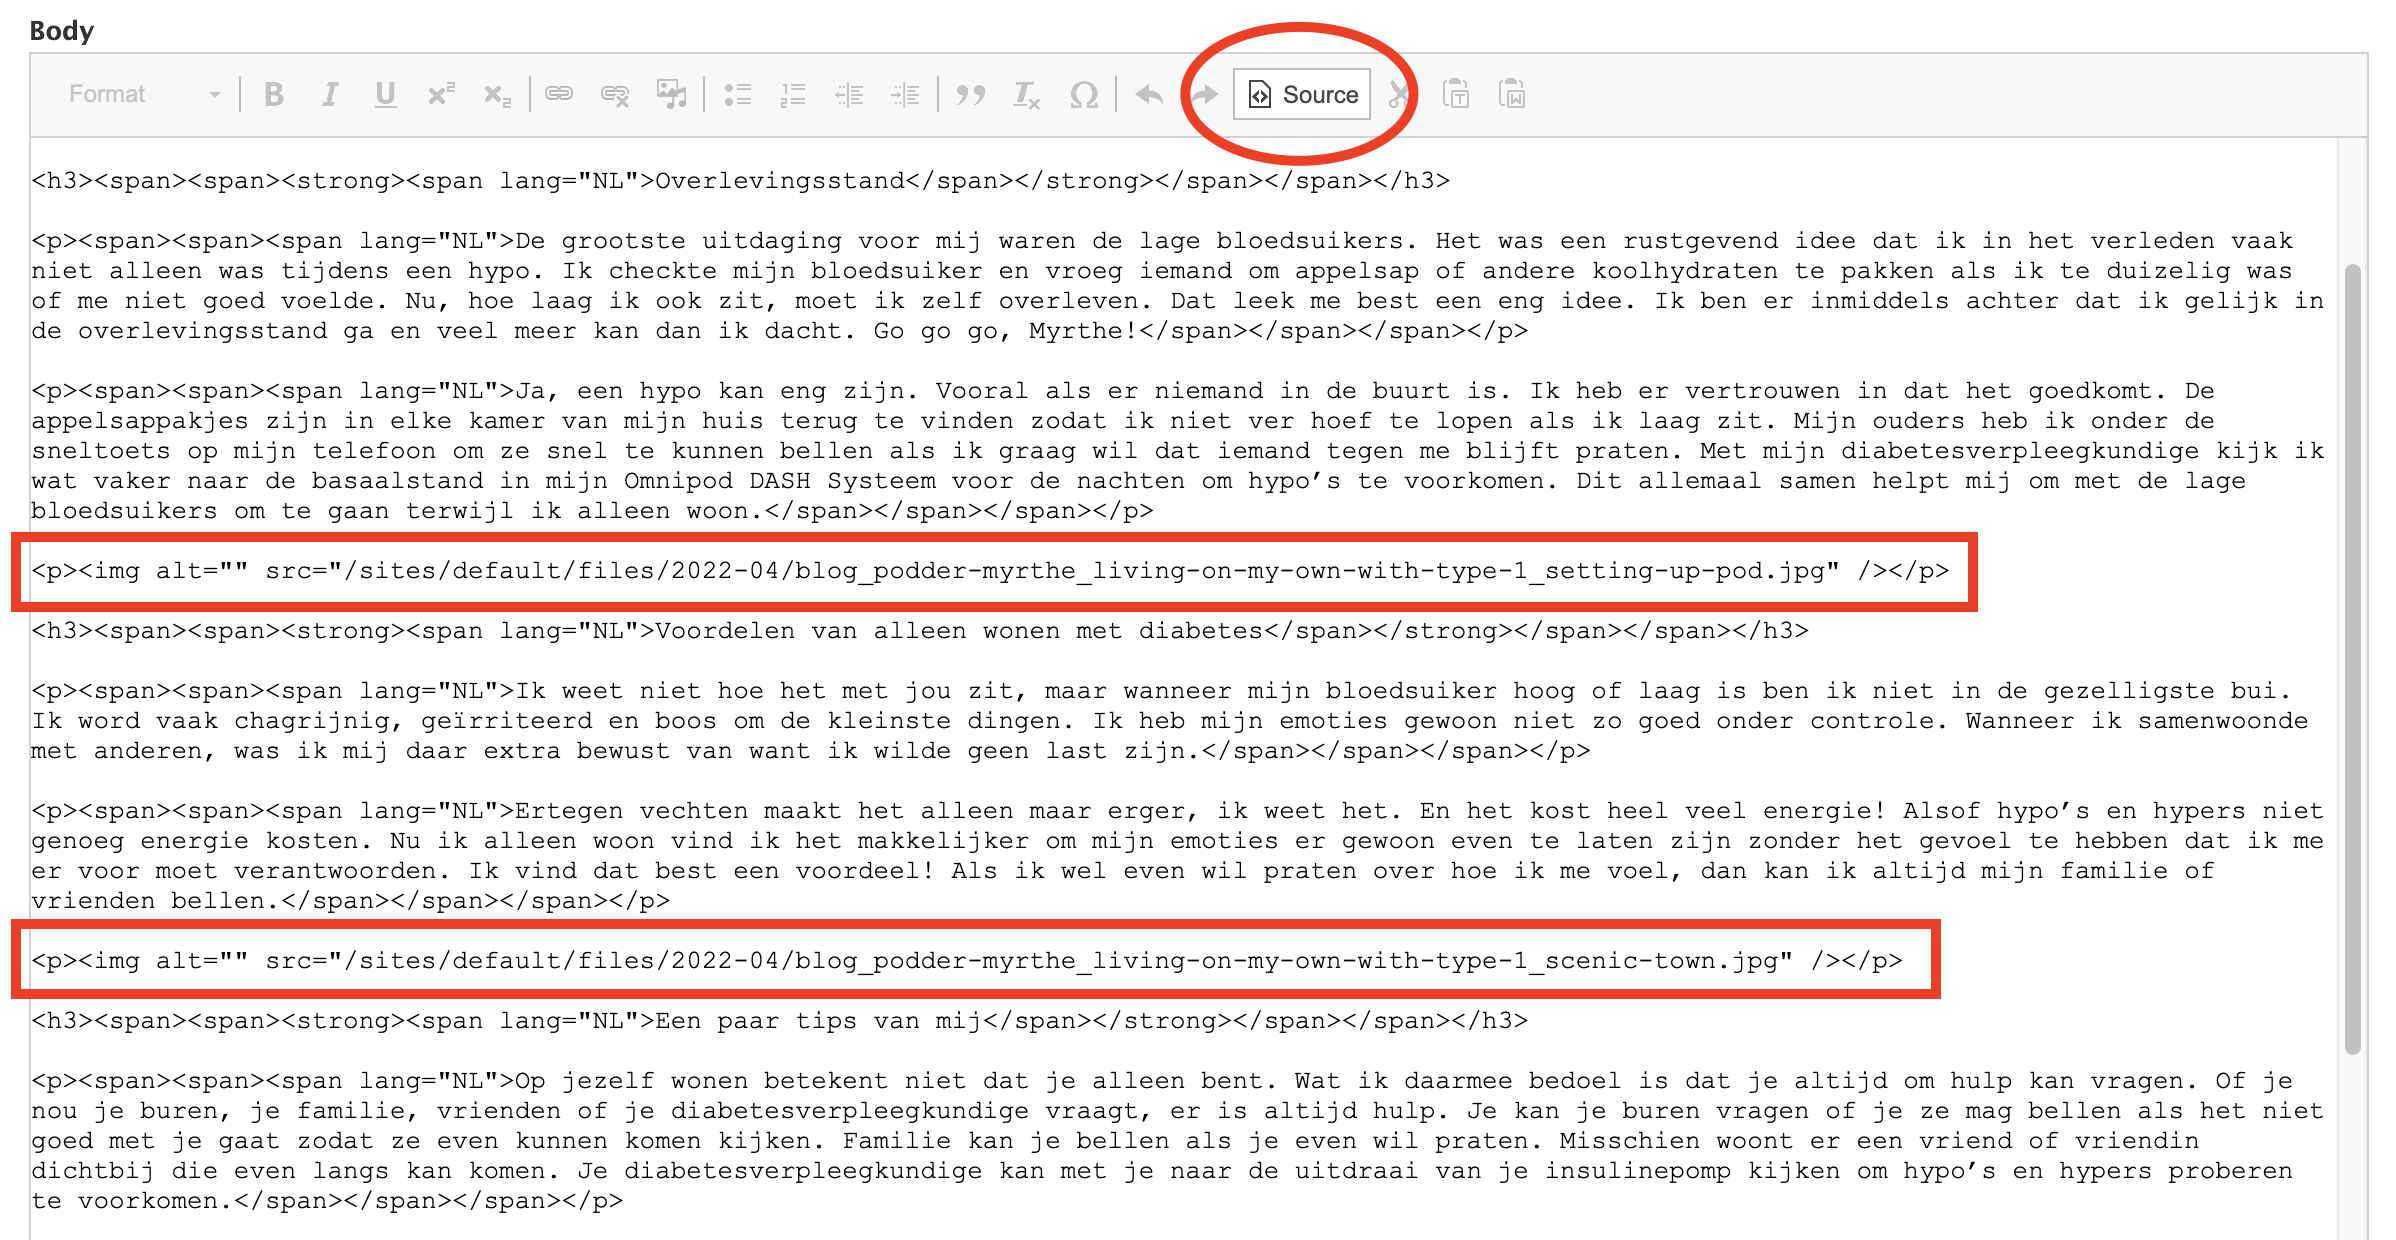
The example HTML code used above can be seen on the "Op jezelf wonen met diabetes type 1" blog post and in the below screenshot:
(Note that the code shown in the screenshot does not include the width= portion as these images did not need to be resized - but the width="" can remain in the code even when it is not needed, so just ignore that portion if you don't need it.)