Omnipod® 5:
FreeStyle Libre 2 Plus Sensor Issues
What do I do if I’m having issues with my Omnipod 5 Pod connecting to my Sensor?
Learn how to resolve communication issues between the Omnipod 5 Pod and your FreeStyle Libre 2 Plus Sensor.
Why does this happen?
Communication issues may occur after activating a new Pod, after switching to a new FreeStyle Libre 2 Plus Sensor, or during normal system operation. This could be due to reasons such as Pod and Sensor placement or if you started the Sensor using a device other than the Insulet-provided Controller. You may see the following messages or alerts in the App:
Your sensor glucose value is unavailable. This usually occurs early in the Sensor’s life when values may be less accurate.

Your Sensor is temporarily unable to send sensor glucose values to the Pod or Omnipod 5 App.

Your Sensor did not connect to the Pod.
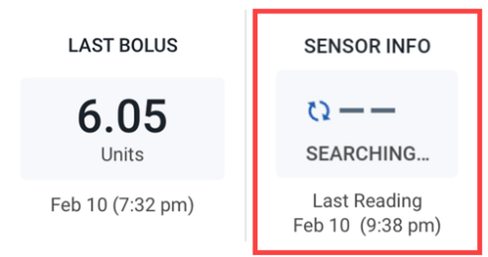
Within the Insulin tab, the Sensor Info display will reflect “Searching…” when the most recent glucose value is not received in a 5-minute window; this message often resolves itself.

A “Missing Sensor Values” Alert will occur when the Pod has not received any glucose values for more than 20 minutes. This only happens in Automated Mode and may be seen when your Sensor is in the 1-hour warmup period.
It may indicate that there has been a signal loss or a problem with your Sensor, and the Omnipod 5 App is not able to display your sensor glucose values or notify you when your sensor glucose is high or low.
If these issues do not resolve on their own, continue to the troubleshooting steps below.
What should you do?
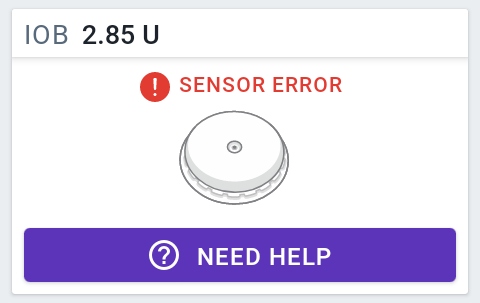
If you are receiving the Sensor Error message, tap NEED HELP for a time to check back for a glucose value. Try again when glucose values are available.
If you are receiving the Temporary Sensor Problem message, wait and try again in 10 minutes.
If you are receiving the Failed to Connect message, try connecting the Sensor again. If the problem continues, replace your Sensor.
- Do not have any other Pods nearby that you may have tried to use or used. This will ensure other Pods are not in Bluetooth communication range of the Sensor (approximately 30 feet or 9 meters)
- Verify that your Pod and Sensor are in direct line of sight. They should be worn on the same side of the body in a way that they can “see” one another without your body blocking communication. Refer to FreeStyle Libre 2 Plus Sensor Placement in the Omnipod 5 User Guide
- Check that your Sensor is still applied to your skin
- Turn on Airplane mode (Tap Menu-Settings-General-Connections-See more), and then turn it off to reestablish connection. Ensure Bluetooth is On, after turning Airplane Mode On and Off.
- Wait up to 20 minutes after Pod activation for the values from your Sensor to appear in your Omnipod 5 App
What if my Pod and Sensor still won’t connect?
Continue troubleshooting by deleting the Sensor and reconnecting it to your Omnipod 5 App following the steps below. You must be in Manual Mode to manage your Sensor. Refer to Switching from Automated Mode to Manual Mode in the Omnipod 5 User Guide.
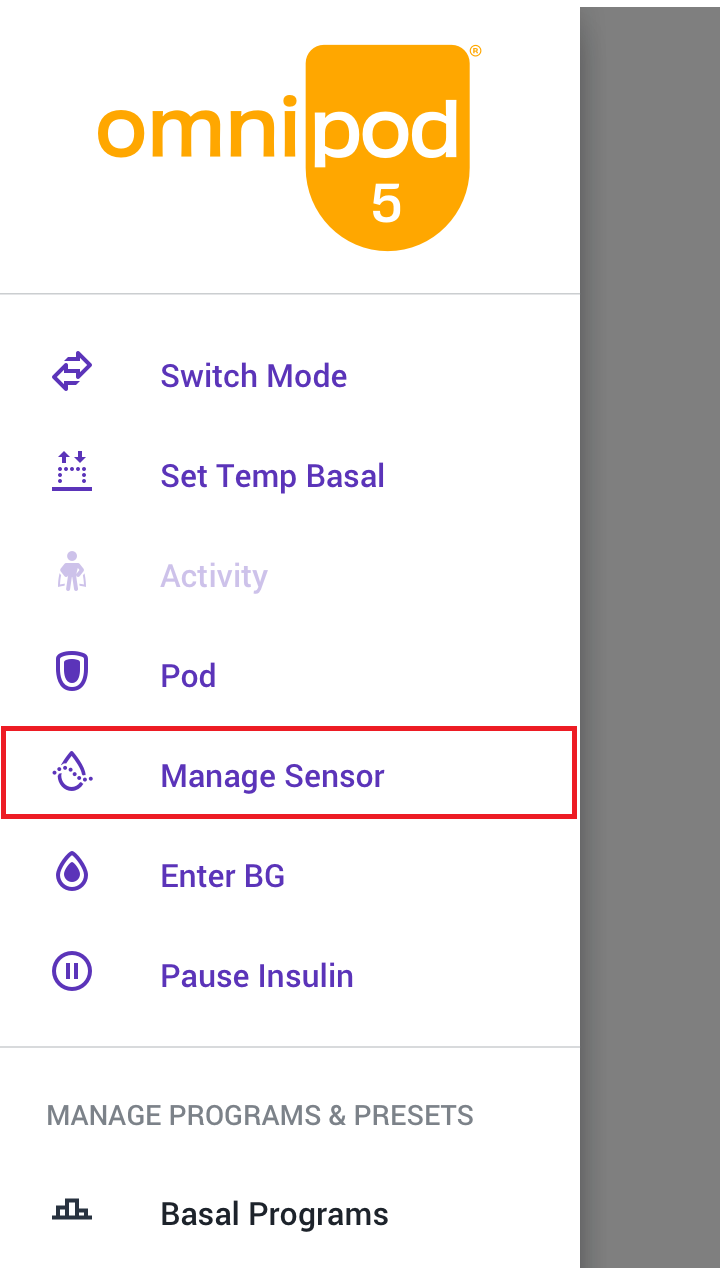
- Tap the Menu button and select Manage Sensor
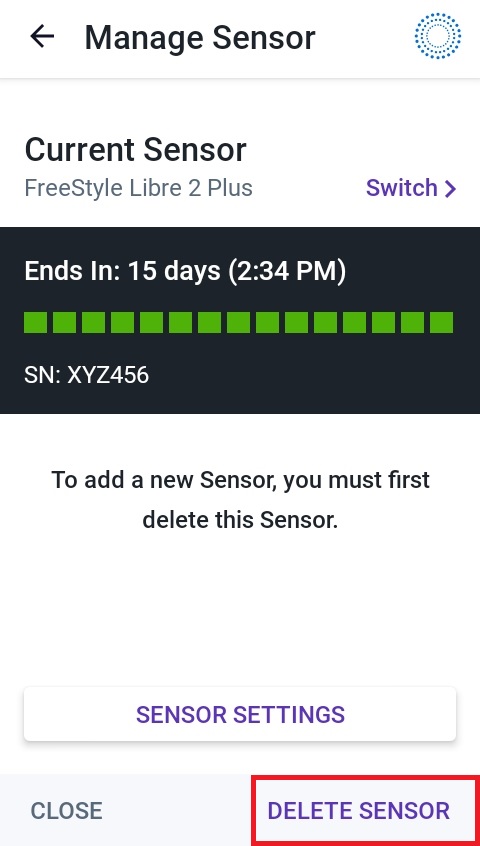
- Tap DELETE SENSOR to remove the existing Sensor
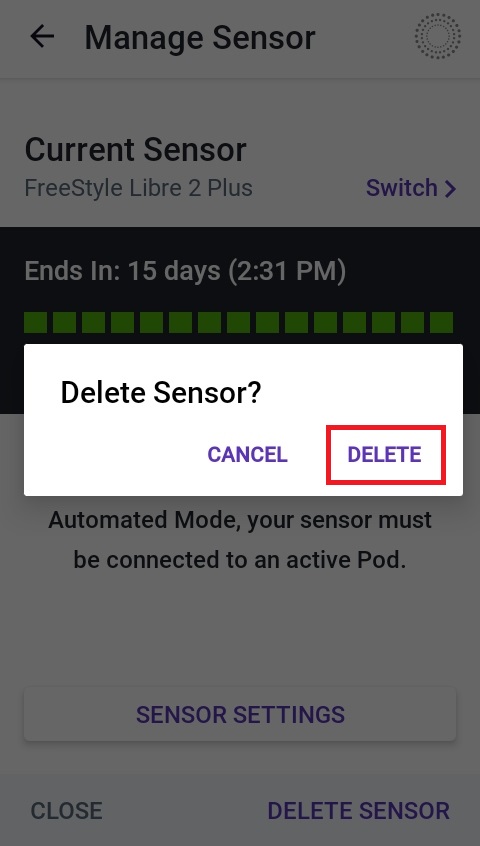
- Tap DELETE to confirm removal of the Sensor
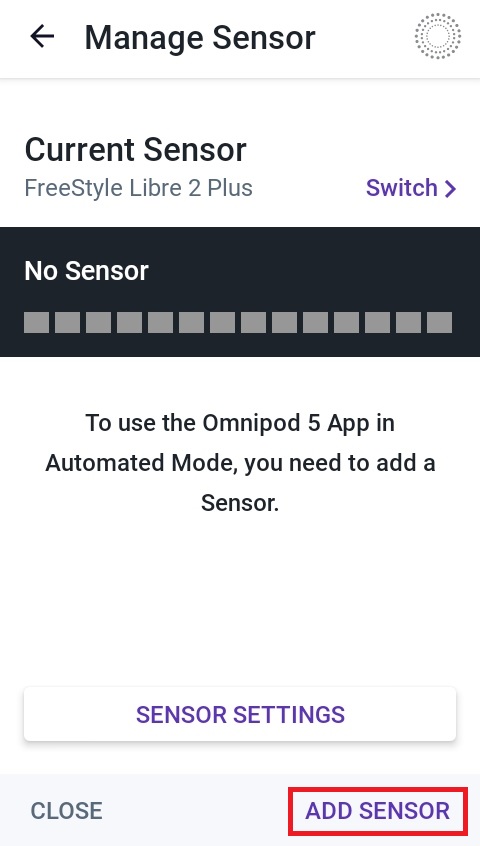
- Tap ADD SENSOR to reconnect Sensor

- Scan Sensor. Tap HOW TO SCAN A SENSOR if you need help
Switch back to Automated Mode. Your App will show Automated Mode: Limited until connection is complete, which can take up to 20 minutes
If you need additional support, call Omnipod Product Support at 1-800-591-3455.